Welcome to Lesson 2 of freeing your mind through Projective Geometry! Last time I tried to make you curious and a little hesitant that maybe you don’t know space as well as you think you did 😁. Then we started drawing and imagining some curves and straight lines. We realized that two straight lines in a plane have to meet at one point somewhere in the plane . . . but there seems to be an interesting exception, when the two straight lines are pointing in the exact same direction (also known as parallel). In this case, it seems like they don’t have a point where they intersect.
I’m not going to take that thought any further in this post, but remember it, because we will come back to it soon. For now, we are going to make a neat-o drawing, and I really encourage you to draw along with me. You’ll need a piece of blank paper (8.5 X 11 is fine, bigger is even better), a pencil, and a straight edge.
Once you master the basic instructions, then the process repeats and repeats. So, don’t sweat it, as you’ll get good at it quickly with just a little practice. Now might be a good time to mention that I really recommend you make mistakes and start over! When you do a drawing the first time, then decide to scrap it and do it again, the gains you make are always really noticeable the second time through. So, don’t listen to your inner critic and just try it out!
This drawing is fun to do and makes a cool image. It’s called a Projective Net and is a good way to start practicing some of the drawing techniques that you’ll continue to use. These techniques are going to help you visualize and understand Projective Geometry (remember, you’re engaging your hand and your mind; both are needed). If you want to learn PG, the time you spend doing this drawing will be time well spent as we will come back to it many times, in many different ways. Here we go:
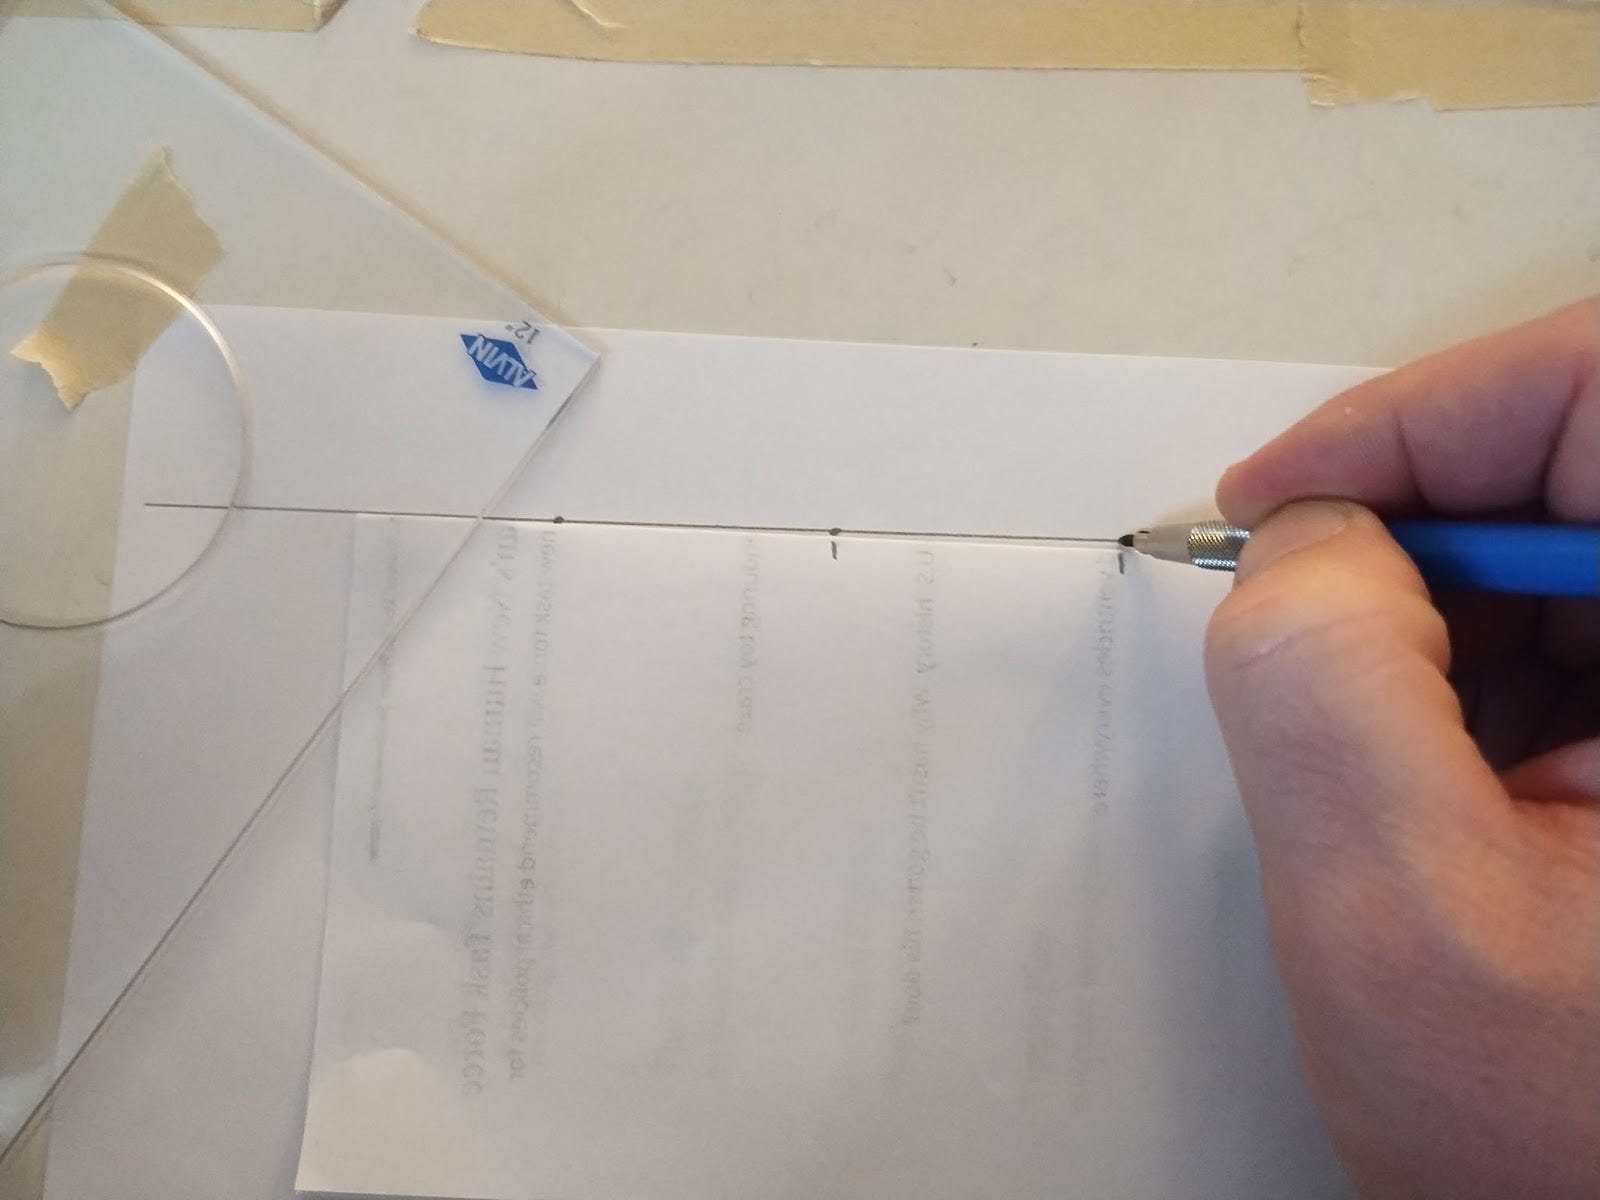
Start by orienting your paper horizontally. I sometimes tape the corners of my paper down to the table to hold it still.
Get a straight edge of some kind (a ruler or anything else that is nice and straight. I have a plastic triangle that I use as you can see below), and draw a straight line horizontally near the top of your paper.
Choose three points on that line that are equidistant from each other. A great trick to do this without a ruler is to mark two points, the left and middle one, then, using a scrap piece of paper, mark the distance between those two points. Then move the scrap paper along the line so the left mark is lined up with the middle point and mark a third point at the exact same distance.
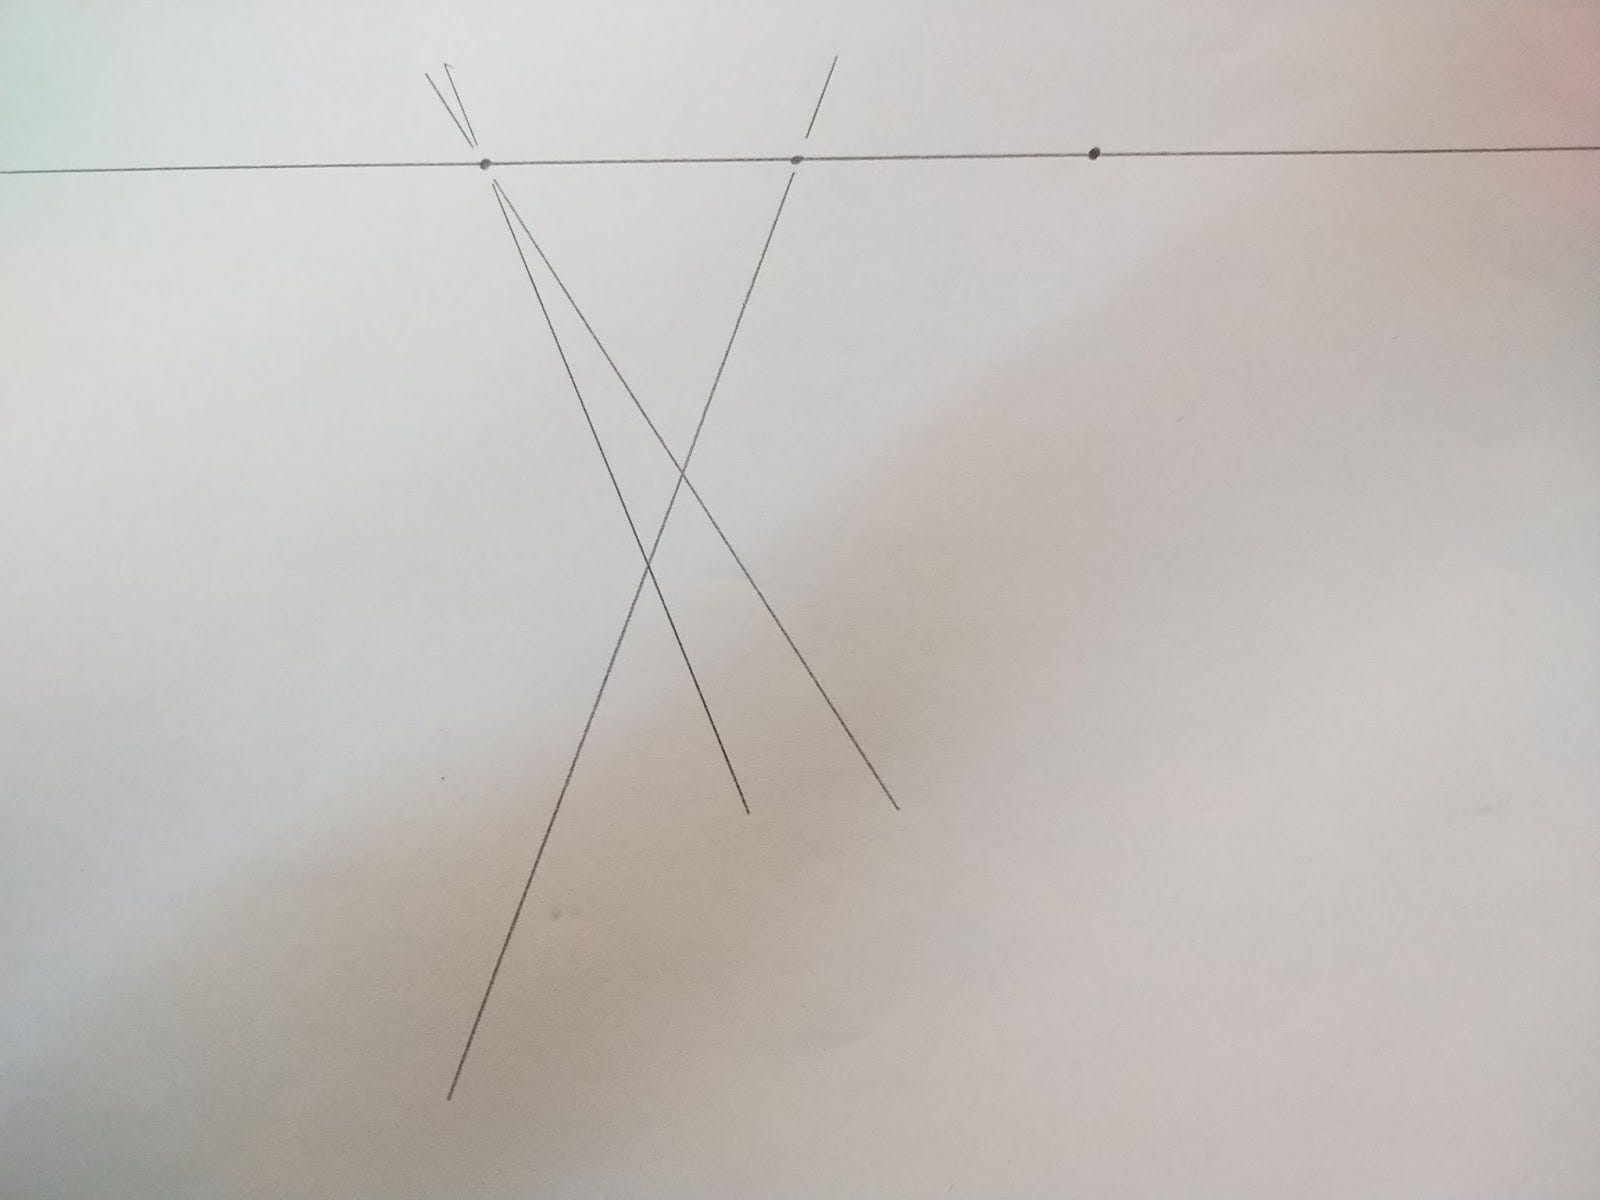
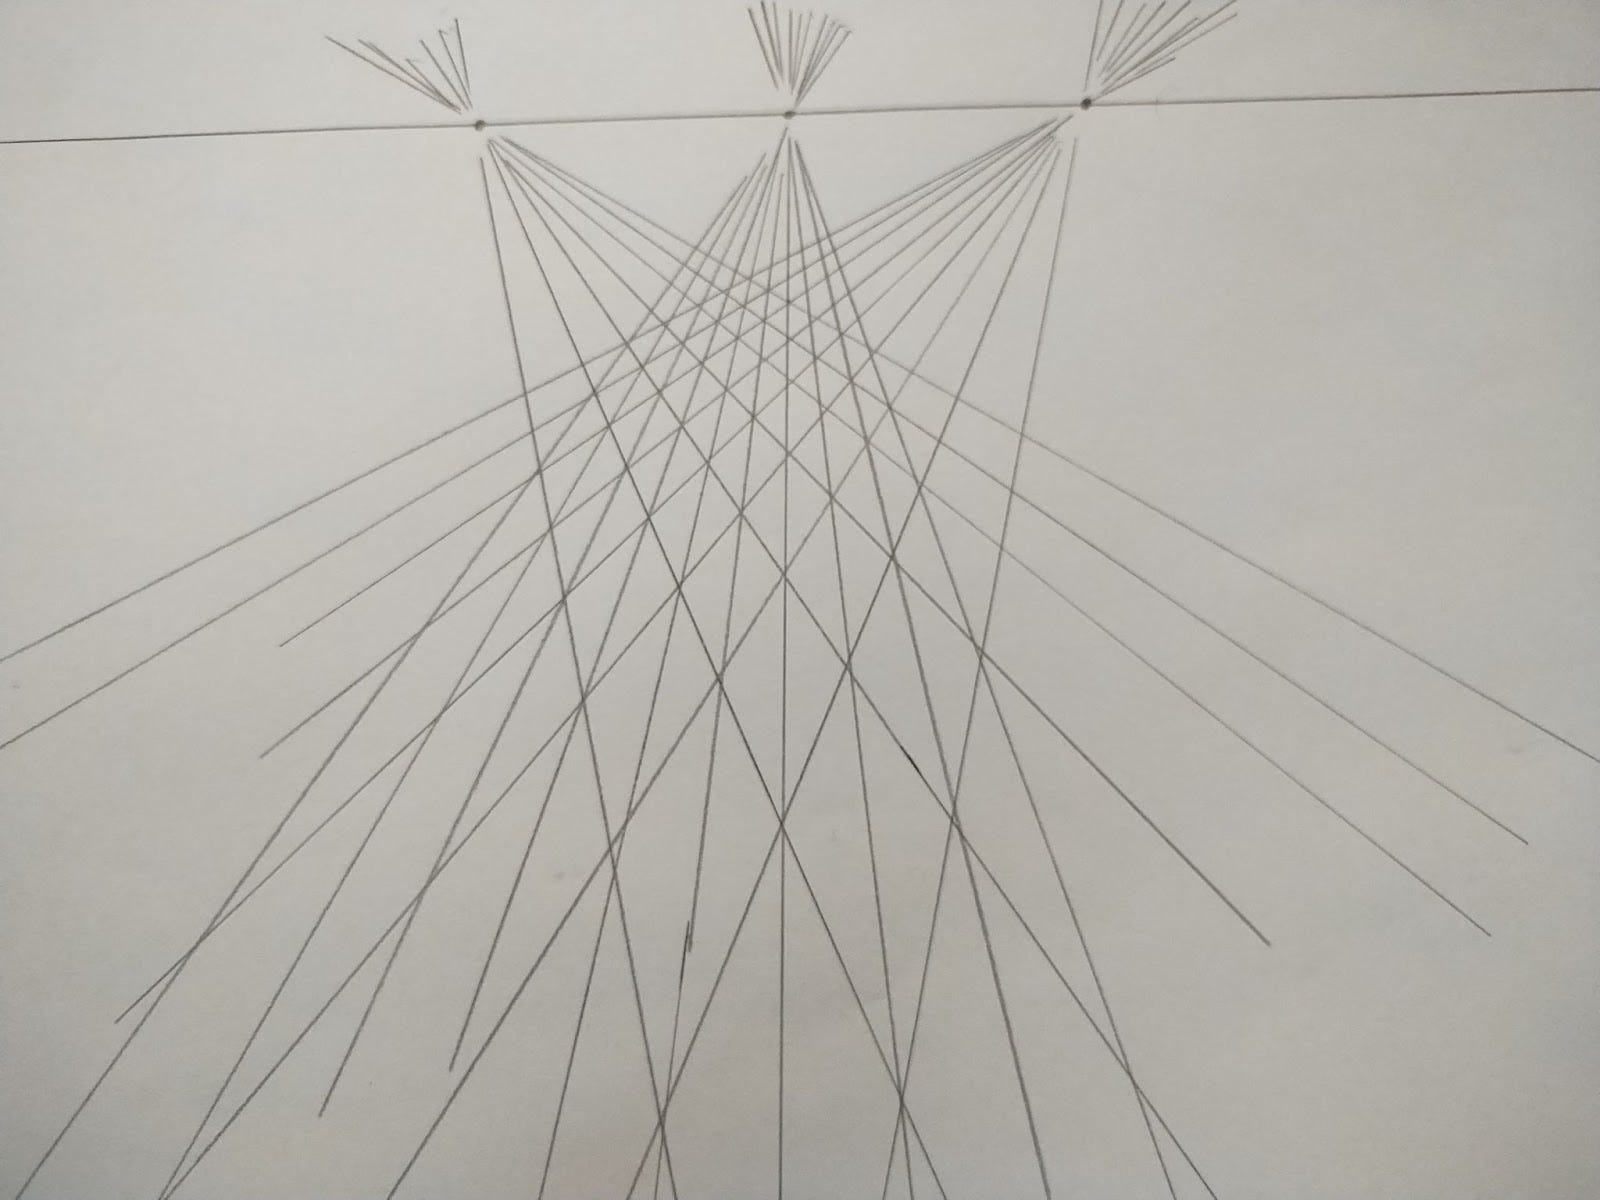
Now, draw a random line through the middle point down at any angle you want into the open space of the page. Then draw two random lines through the left hand point that cross this first line you drew. Here is what you have so far.
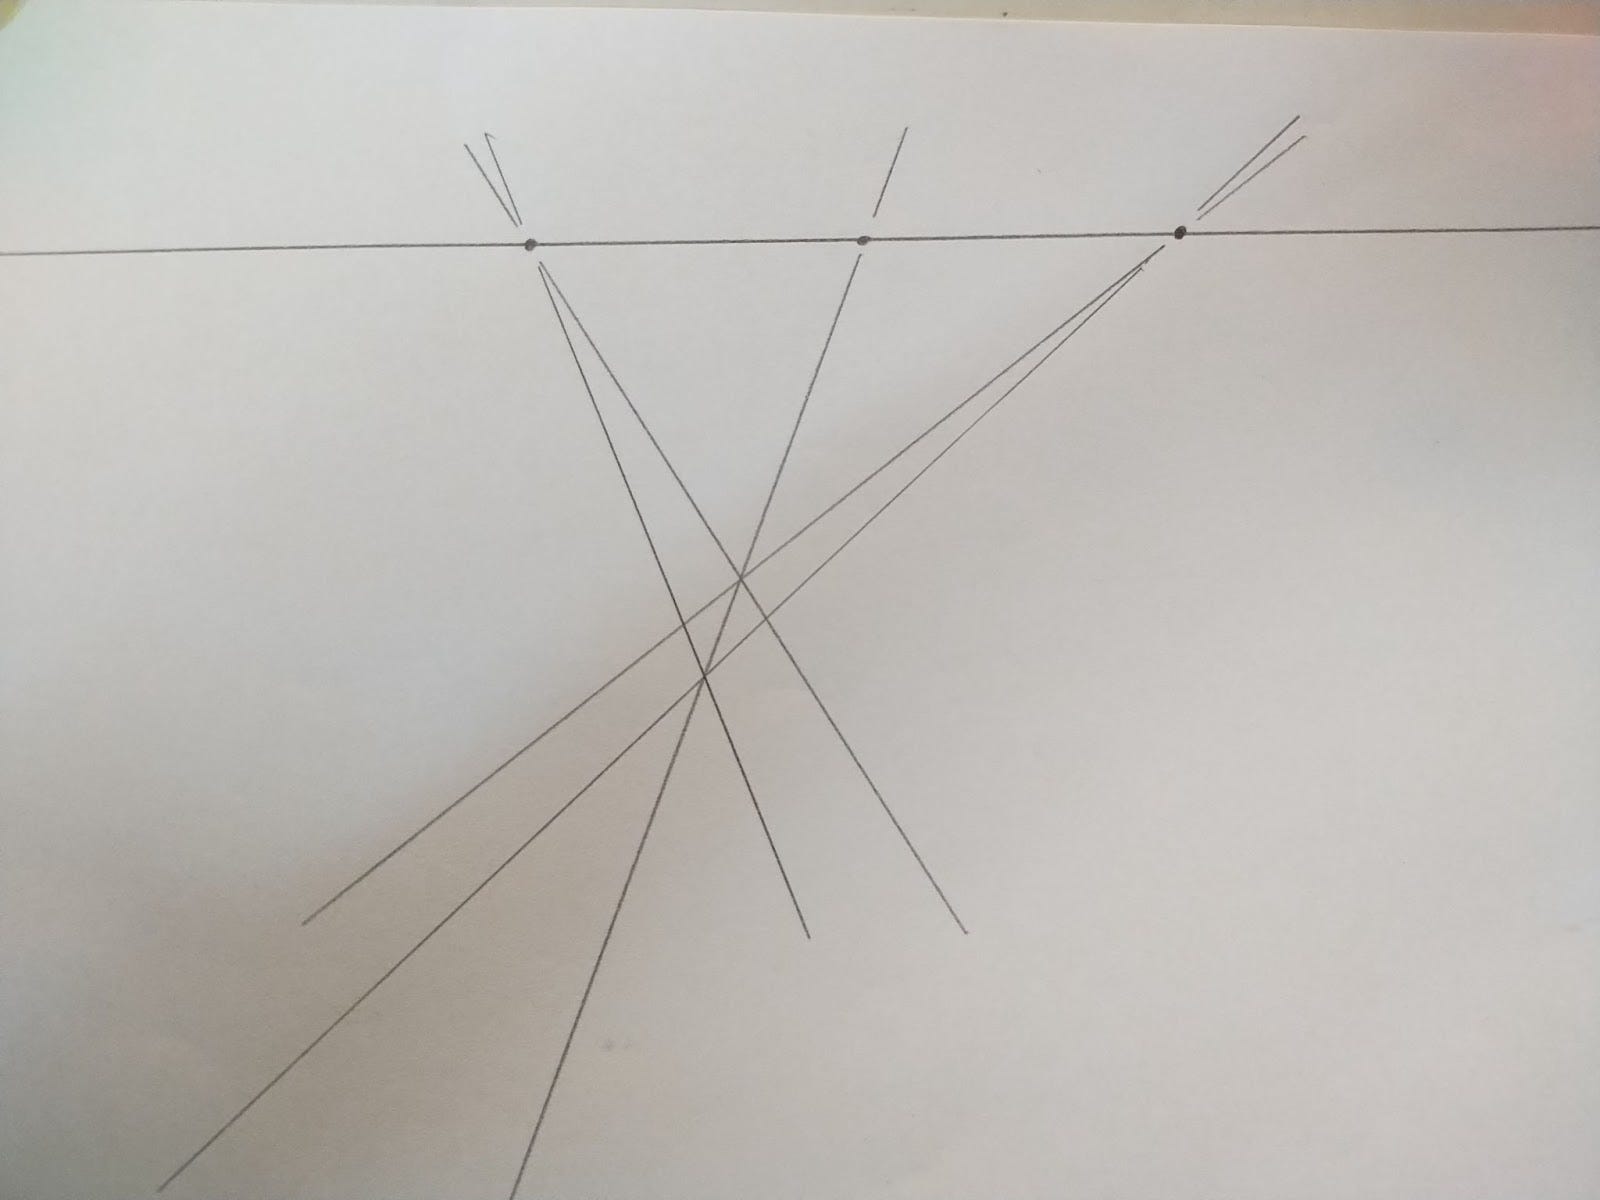
You’ve made two new intersections with the first line. Draw two lines from the third point to those two intersections. Here’s what your drawing should look like now:
You’ve made a couple of triangles consisting of the intersections of the one line from the middle with the two lines from each of the right and left points. Notice that by doing this, you’ve created two new intersections, and that you could draw two more lines from the middle point through those intersections.
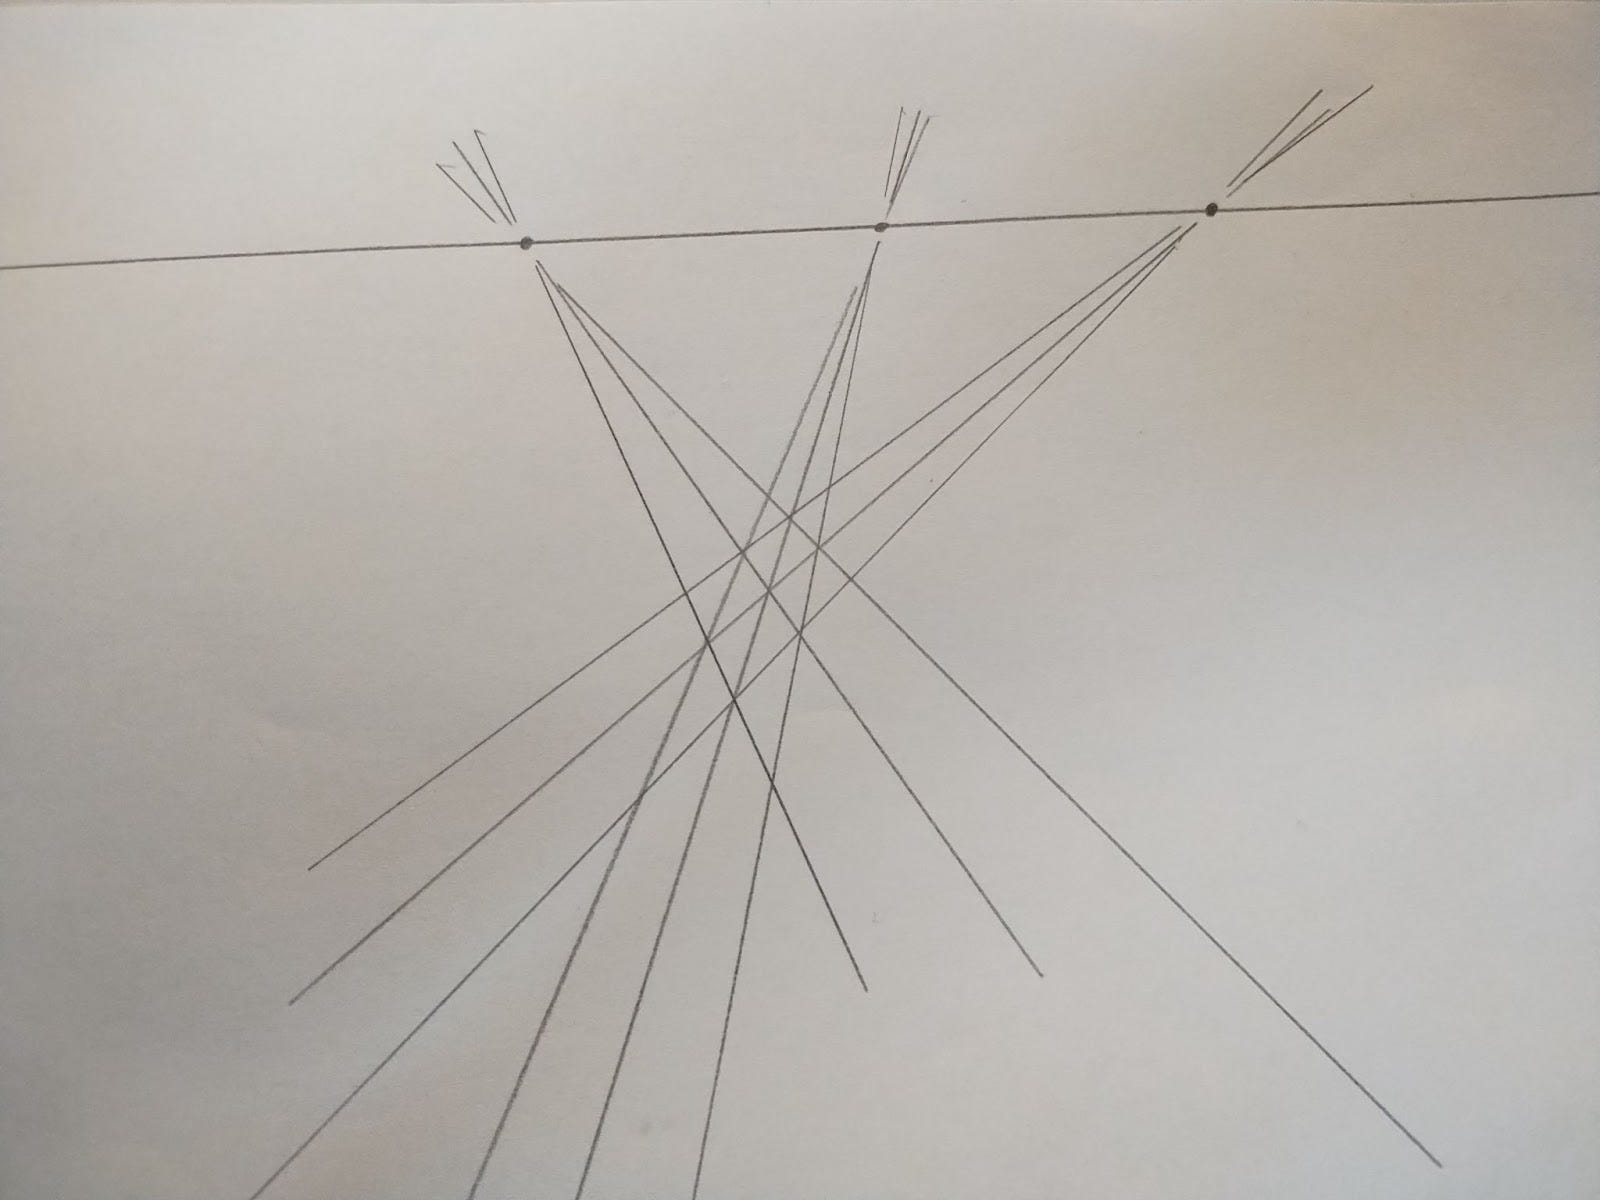
Now, carefully keep drawing new lines from whichever point (left, middle, or right) that doesn’t already have a line going to an existing intersection. Every time you connect to an existing intersection of two lines with a third line, you will find that in the process of drawing that new line, you make new intersections that can be connected with more lines from the other points. It’s very much like a weaving process in which you are trying to fill the page with intersections that all have three lines passing through them, one from each point.
Don’t give up, and just start over if you get lost! You should find that you are starting to get into a flow as you keep finding intersections. Try to be meticulous and not miss any before you connect the existing ones. Remember to breathe slowly and enjoy it!
You may soon discover (perhaps to your surprise!) that some of the new intersections that need to have a third line drawn through them are naturally lining up and point back to the missing point on the horizontal line. This is supposed to happen and should help you a lot in finding where to weave in a new line. The new intersections will seem to magically be showing you where to draw the next line. Once you develop an eye for it, it can become quite rhythmic (and/or obsessive depending on your personality!) to keep finding new places to lay down lines.
Notice a helpful technique illustrated in my drawing, which is to lift my pencil for a moment and not actually draw the lines through the original three points. This is so the point locations don’t get obscured by many lines passing through them.
The page should be filling up with triangles, although each one is a different shape and size from any other. Those triangles that you find further away from the horizontal line are getting bigger, while those approaching that line are getting smaller. These get so small eventually that you can’t distinguish the connections any more. The bigger ones go off the page pretty quickly, but you can imagine them continuing. Can you see places in my drawing where I can draw more lines? I’ve got plenty more I can do!
Maybe you can see already that this drawing, without much strain to the imagination, has a very 3-D look to it, doesn’t it? We seem to be revealing a kind of patterned surface (a tiled plane) by doing this weaving process. Next time, we’ll look at this pattern and see some more very intriguing things that are naturally produced when you make this simple repetitive drawing. In the meantime, keep filling it out and we’ll start to do some coloring and thinking about it next.
I’m very cognizant of giving you bite-sized lessons that don’t have too much at one time. We will do much more with this net, so if you drew one, keep it and I’ll pick back up with it in PG Lesson 3!
Your comments and likes are always appreciated!
I offer Brian Does Whatever He Feels Like Doing, Gosh! to you as a gift, with no paywall. You give back to me through your reading and kind attention, your likes and comments, and if you choose, either a free or paid subscription. Paid subscriptions support me financially to be able to do more of this writing. You can go to this post, and this one to read more about why I do it this way.
Okay I got it! I also see where you could draw more lines. I have no idea what I was doing before but it wasn’t correct so I’ll let that go and continue with my triangles on this one.


I spoke too soon! I have lots more triangles but I have a few other four sided shapes. Help needed! I could take a picture and send it to you - later.
Okay I got it! I also see where you could draw more lines. I have no idea what I was doing before but it wasn’t correct so I’ll let that go and continue with my triangles on this one.