

Projective Geometry Lesson 4
A Hidden Fourth Point

Picking up where we left off last time with the Projective Net, we asked a couple questions that I hope you’ll remember and keep in mind as we take this next step. They had to do with why parallel lines showed up automatically in the Projective Net drawing with equidistant points, and why all the intersections line up and point back to all three points.
Is it clear to you that what we've drawn is a perspective picture and that the points are what is known as “vanishing points” and the horizon the “vanishing line”? You can look at it in two ways: one way is as a 3-D plane stretching all the way forward to the infinite horizon and all the way around and behind you. Alternatively you can see it as simply a flat picture of a triangle pattern that is all squeezed together close to the top line, and expands as you move down the flat page. It's your inner mental activity that makes the drawing appear 3-dimensional.

Let's now ask ourselves this question: When you start to make the Projective Net drawing, what choices do you have, and when have you used up all your degrees of freedom and the rest of the drawing is “automatic”?
To answer this, let’s review the drawing process: You draw the horizon line, then you place a point on that line. You place a second point wherever you like also on the horizon. Then the third point is placed equidistant from the second. You then draw one line through the middle point, and two lines through the left hand point that cross that line.
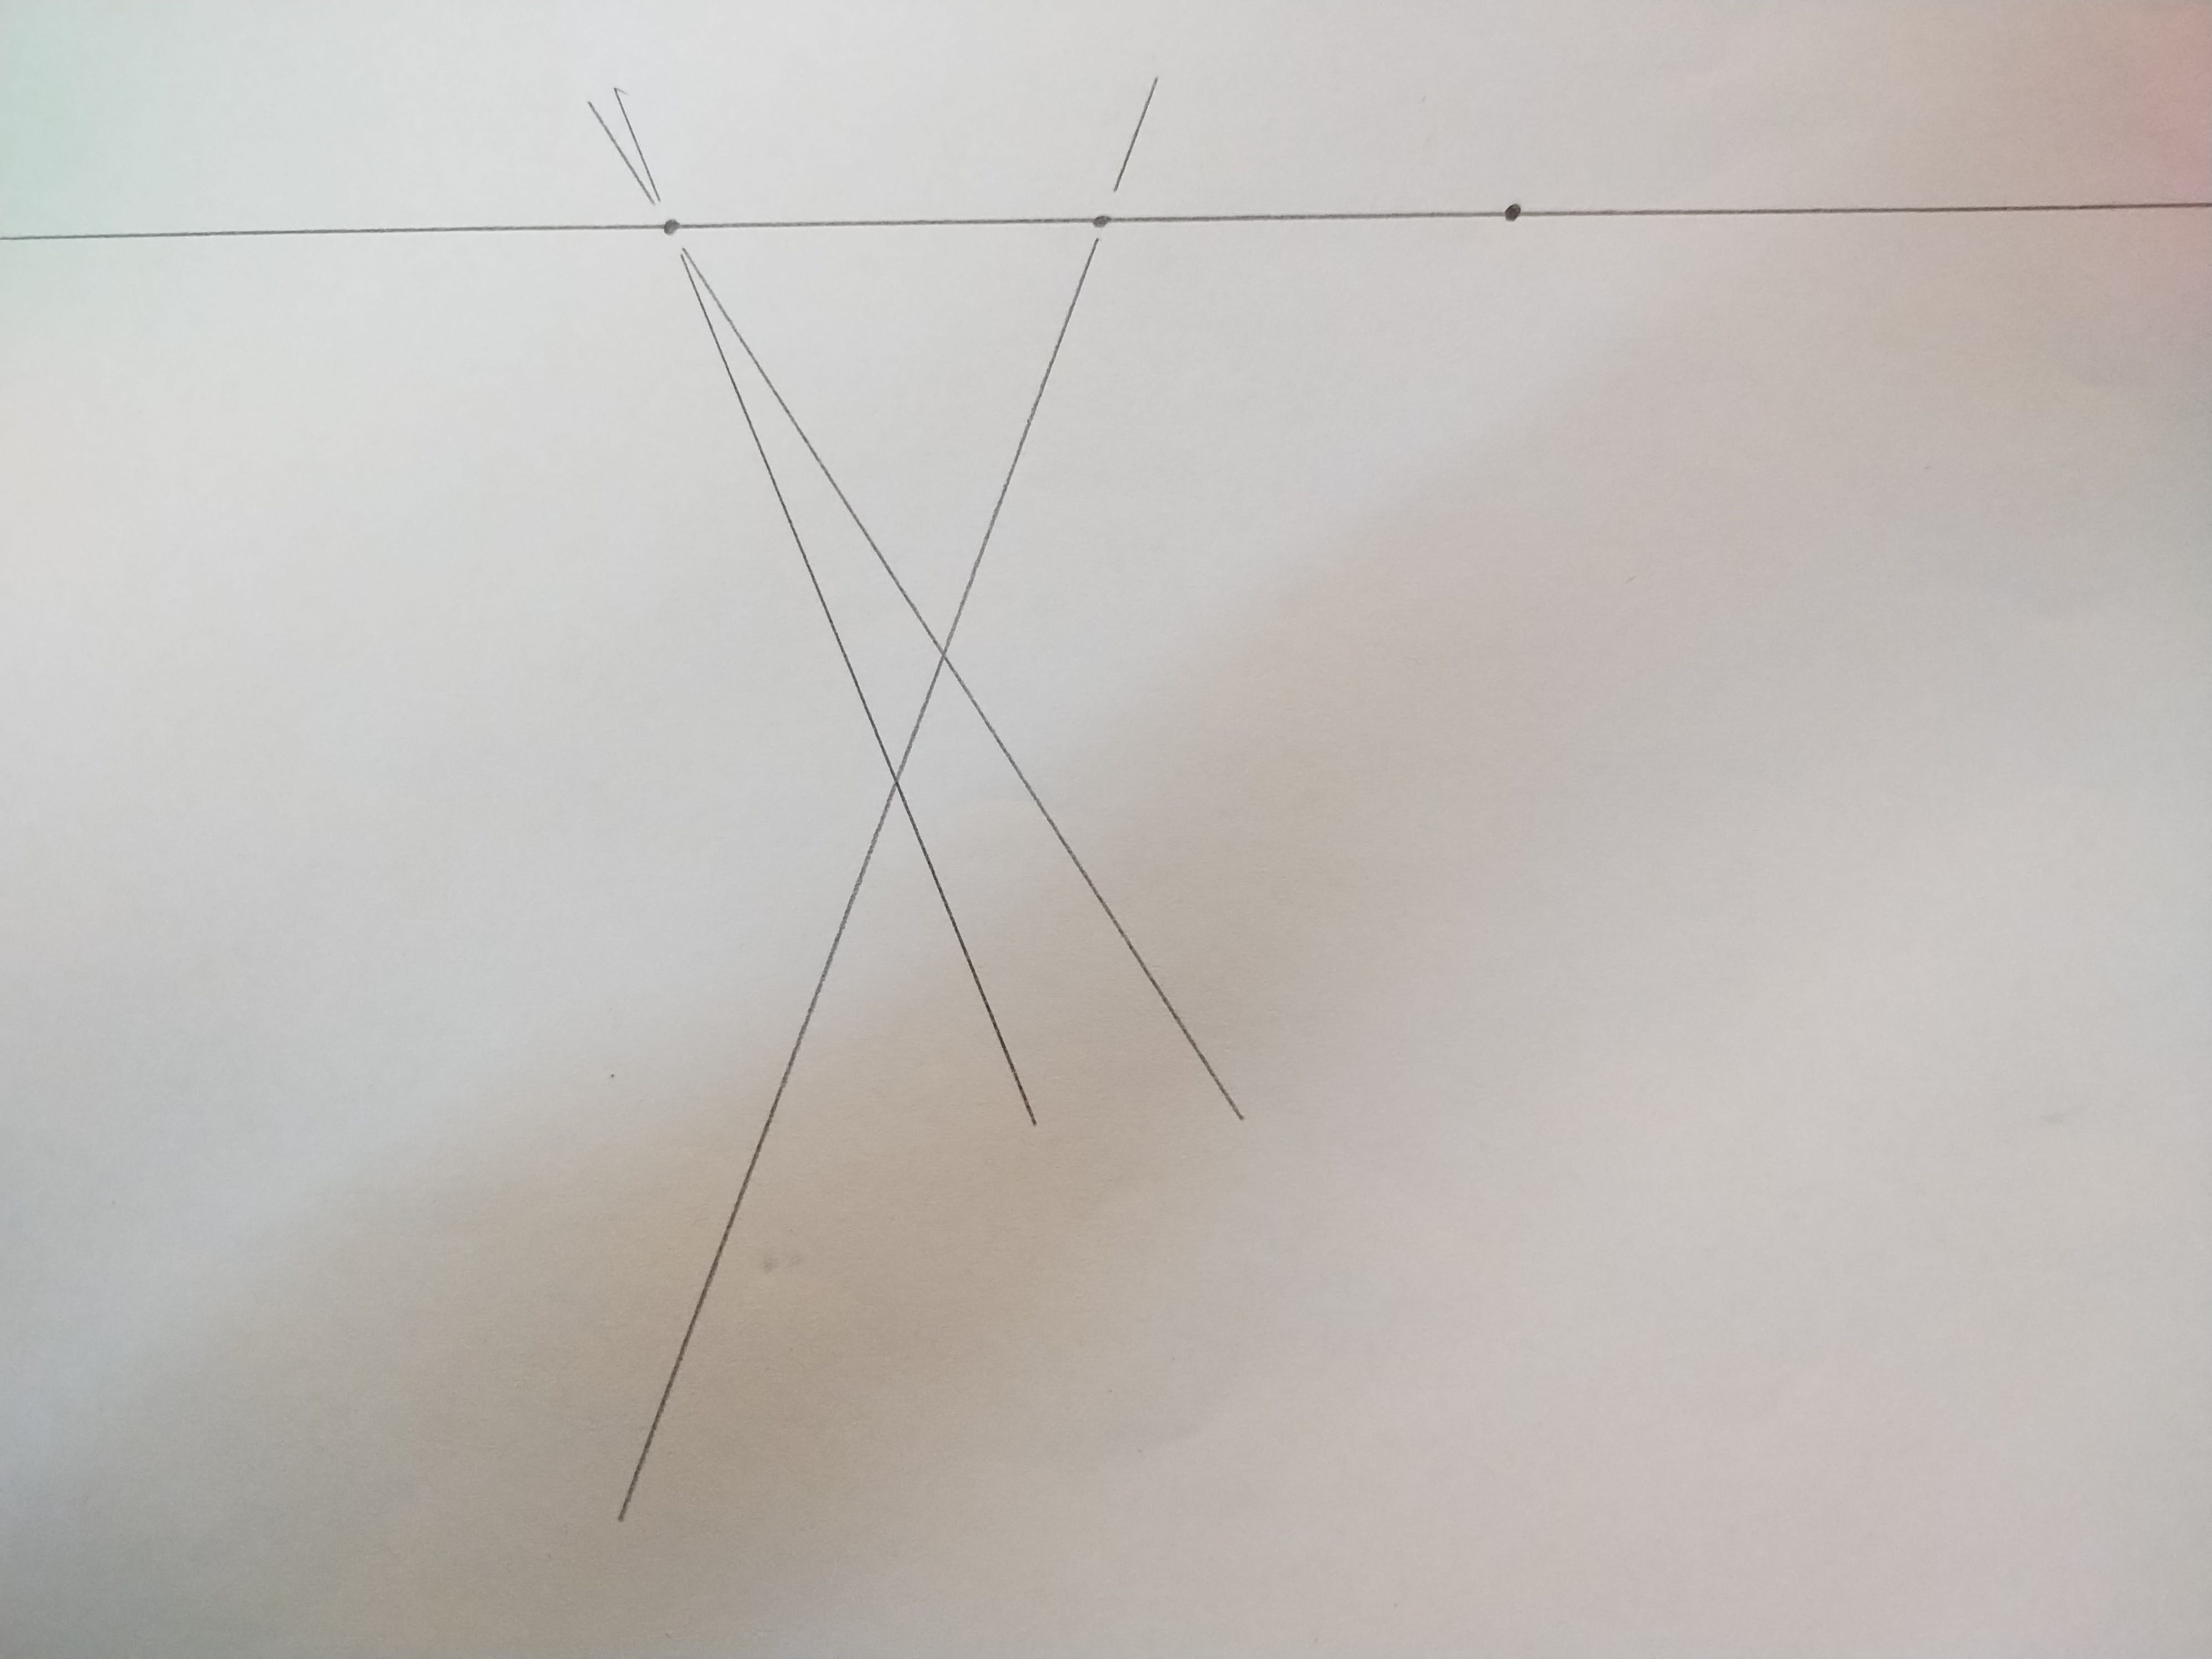
It is right here at this step where you're done making choices. Everything flows automatically now as you fill in the paper with triangles by connecting new lines from one of the three points to intersections that need them.
We could really think of it in this intriguing way: by choosing three points and drawing three lines, we've already created the conditions where the entire Net has been created. We just have to draw it to make it visible.
And the real Net that we draw on our paper is a physical picture of an ideal reality. The three points and three lines, as soon as they are drawn, immediately cause the whole Net to pop into being. The Net is built into the choice of placing your points and initial three lines.
Let's start to draw another Net, but don't fret, we won't complete the whole thing. We will make one small change to the setup.
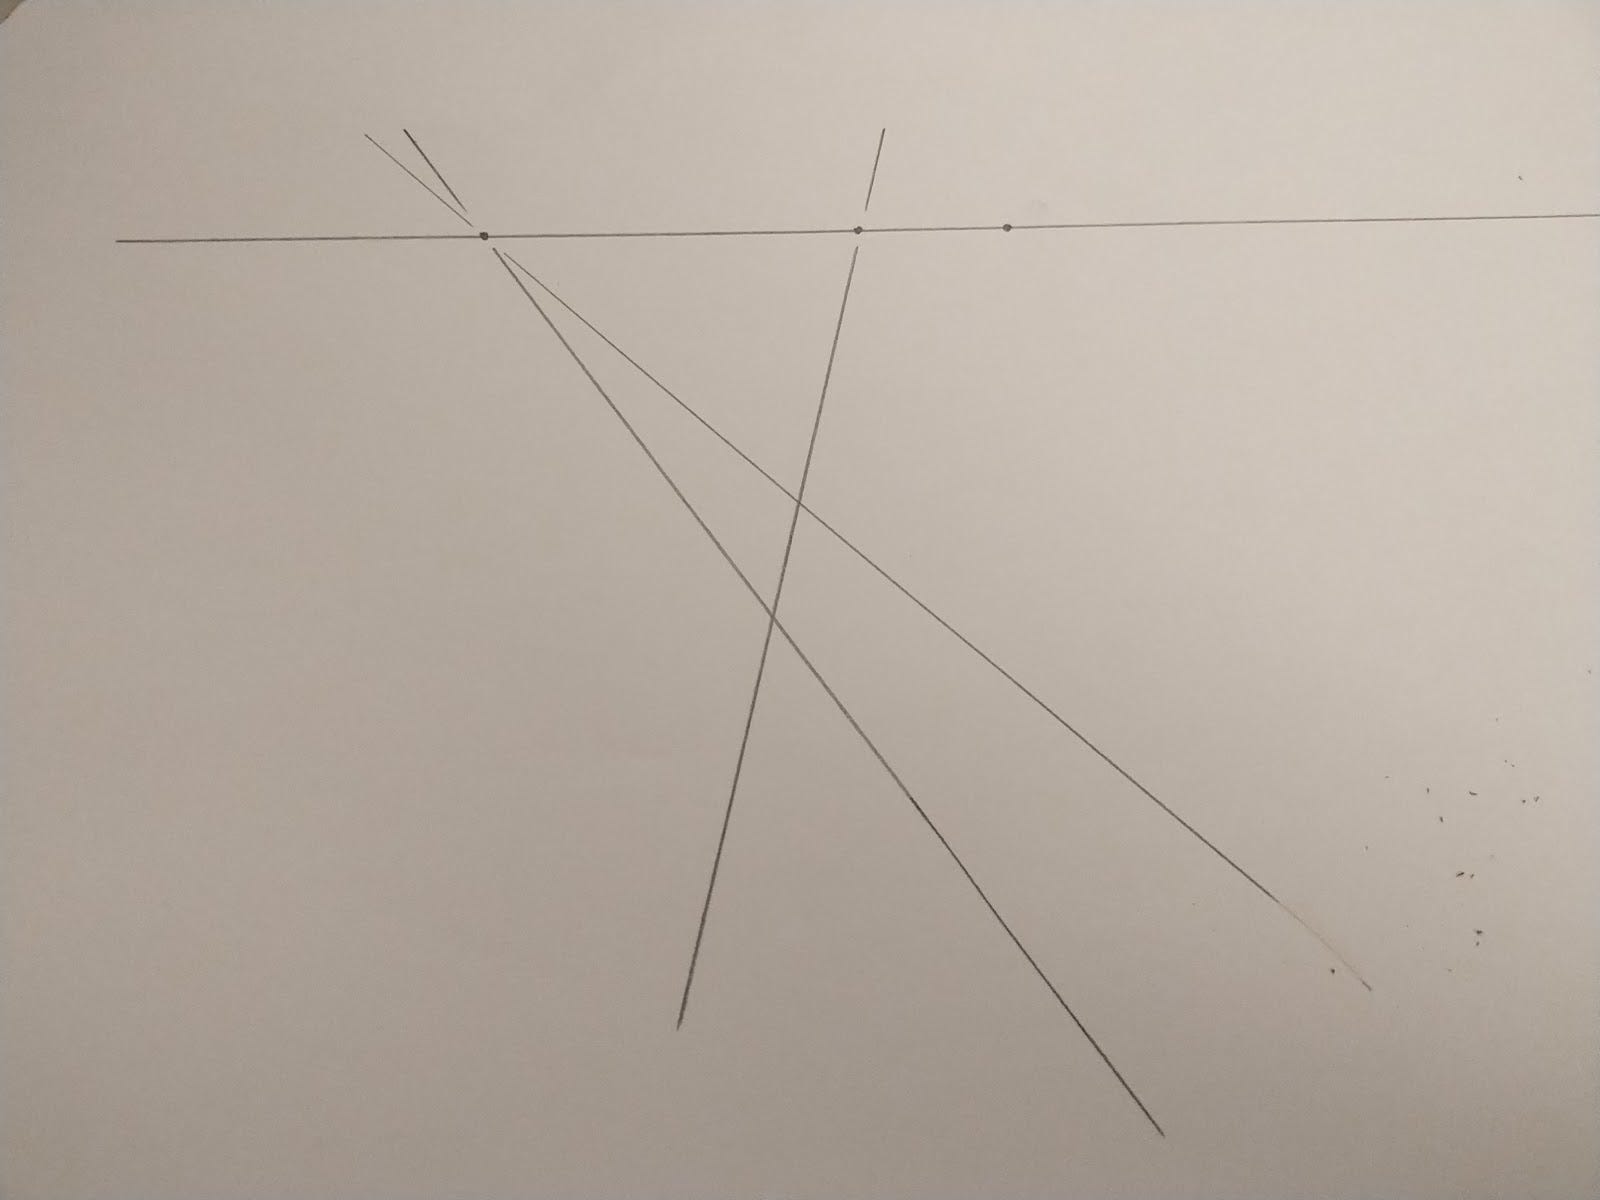
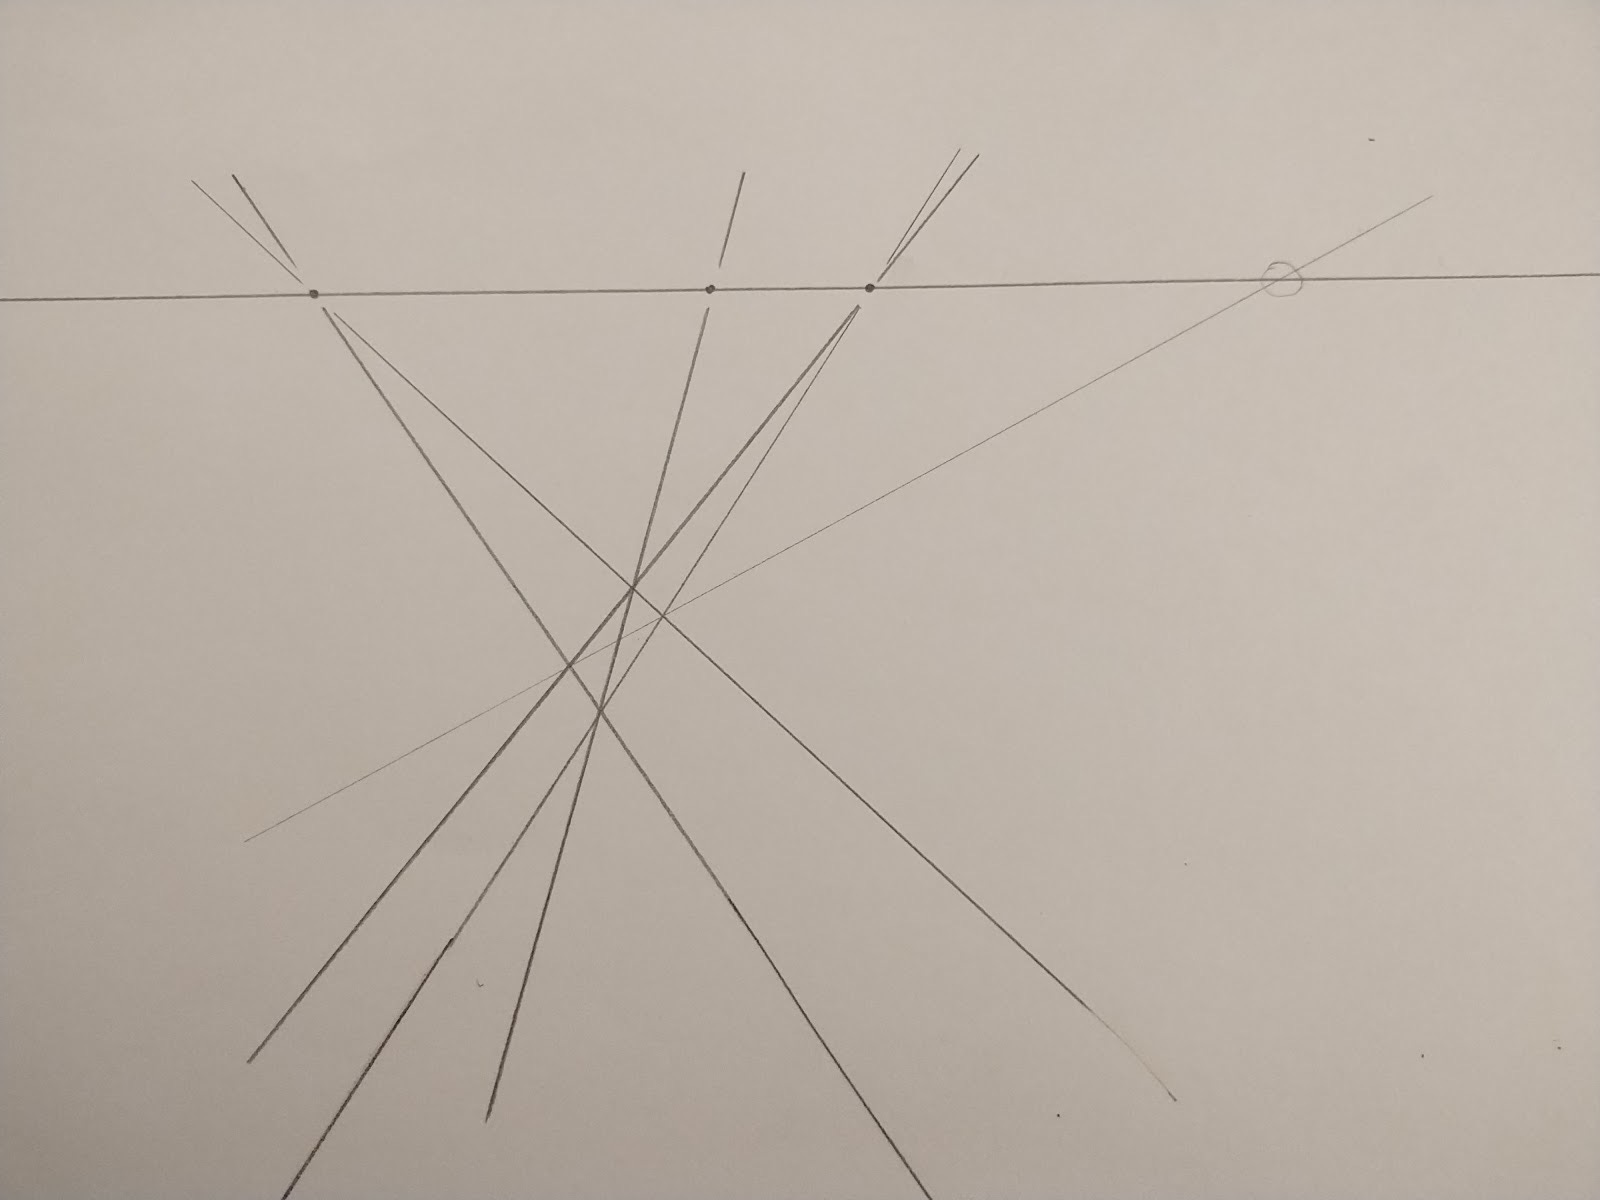
Draw your horizon line and place two points just as before. But when you place your third point, place it no longer equidistant but with purposely different spacing. In my drawing I've made the third point noticeably closer to the second point than the second is to the first. And notice that I gave myself some room on the right side for something interesting to happen . . .(that's a hint for you to set up your drawing like mine so you can follow along)
Now draw your first three lines. This is where you've used up your degrees of freedom and the pattern is now set. The whole Net is already “there”, we just won't draw it all this time.
Draw the two connecting lines from the third point:
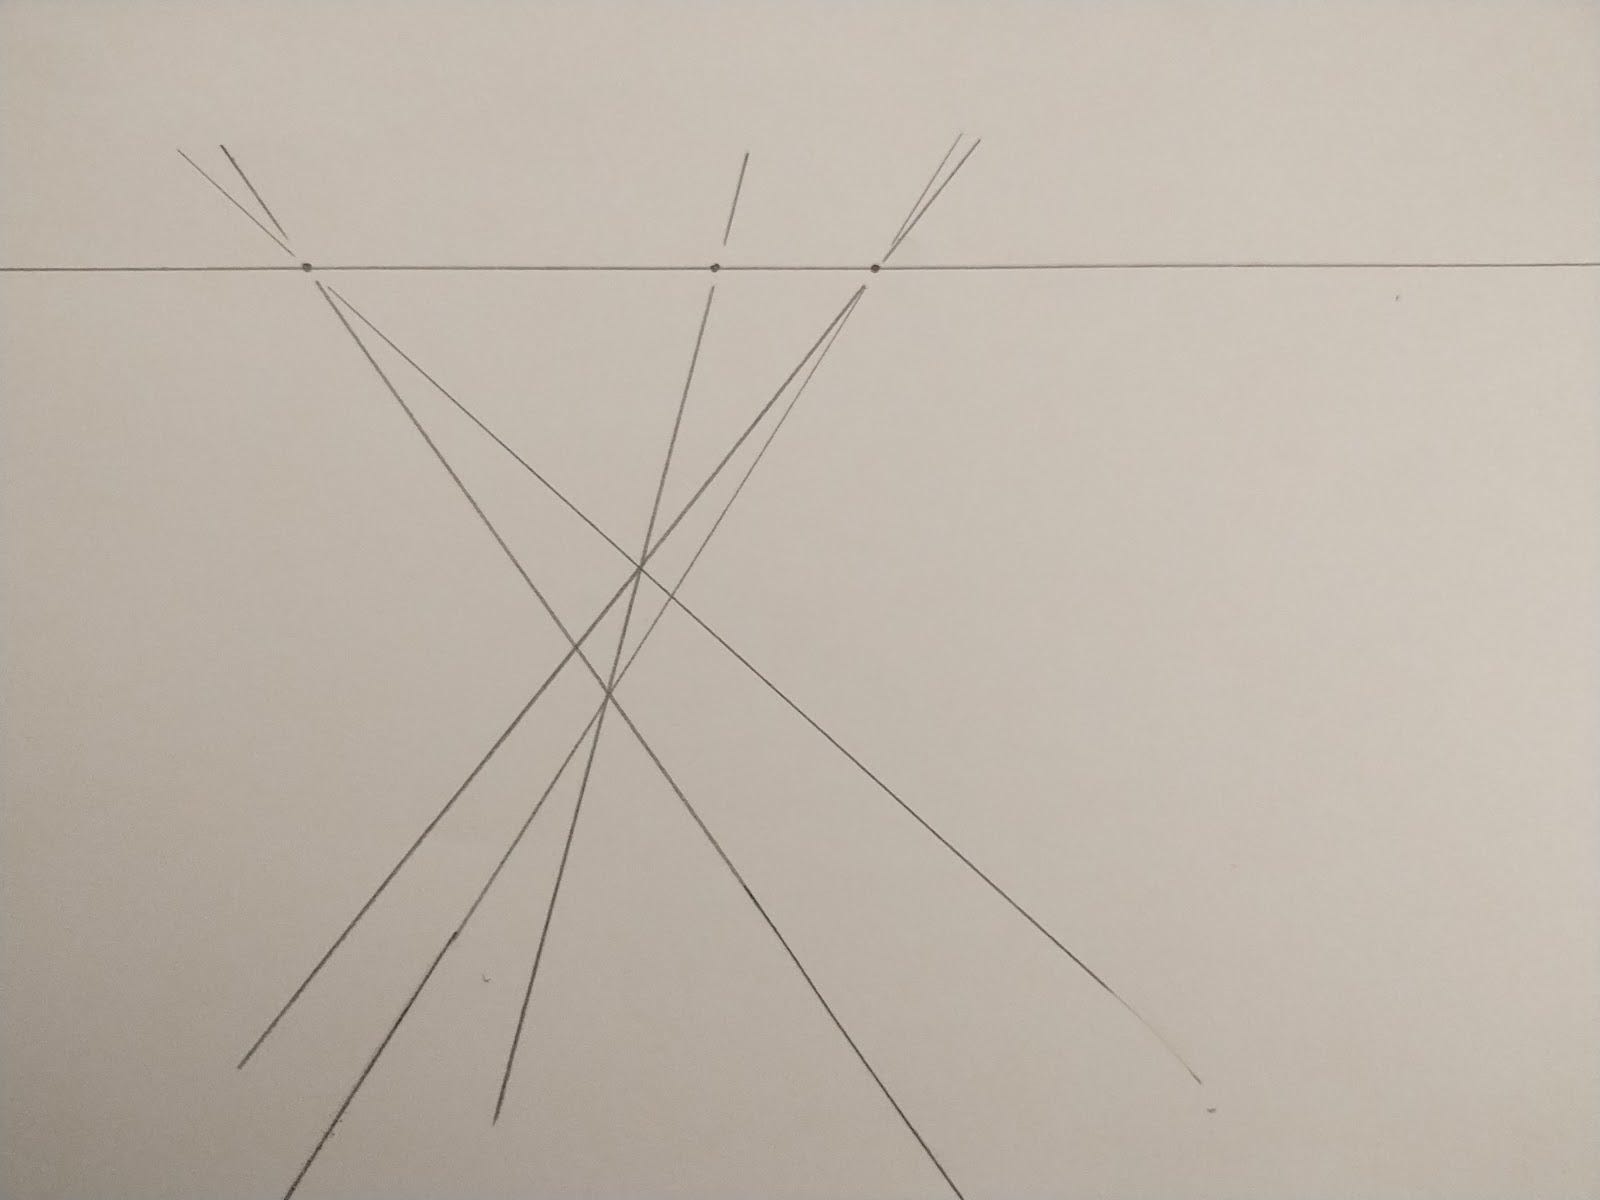
You've made a quadrilateral, a four sided shape. It has one diagonal crossing it, the line going to the middle horizon point. We could now keep going, making more and more connections, but instead. . .
if you place your straight edge along the direction of the missing diagonal (the one that was parallel to the horizon line in the first Net drawing), you should find something very interesting. It seems to be pointing back to the horizon line to a new location, a special fourth point.
Do you think if you continued filling out the Net that all the other missing diagonals would point to that same point? Try it out.
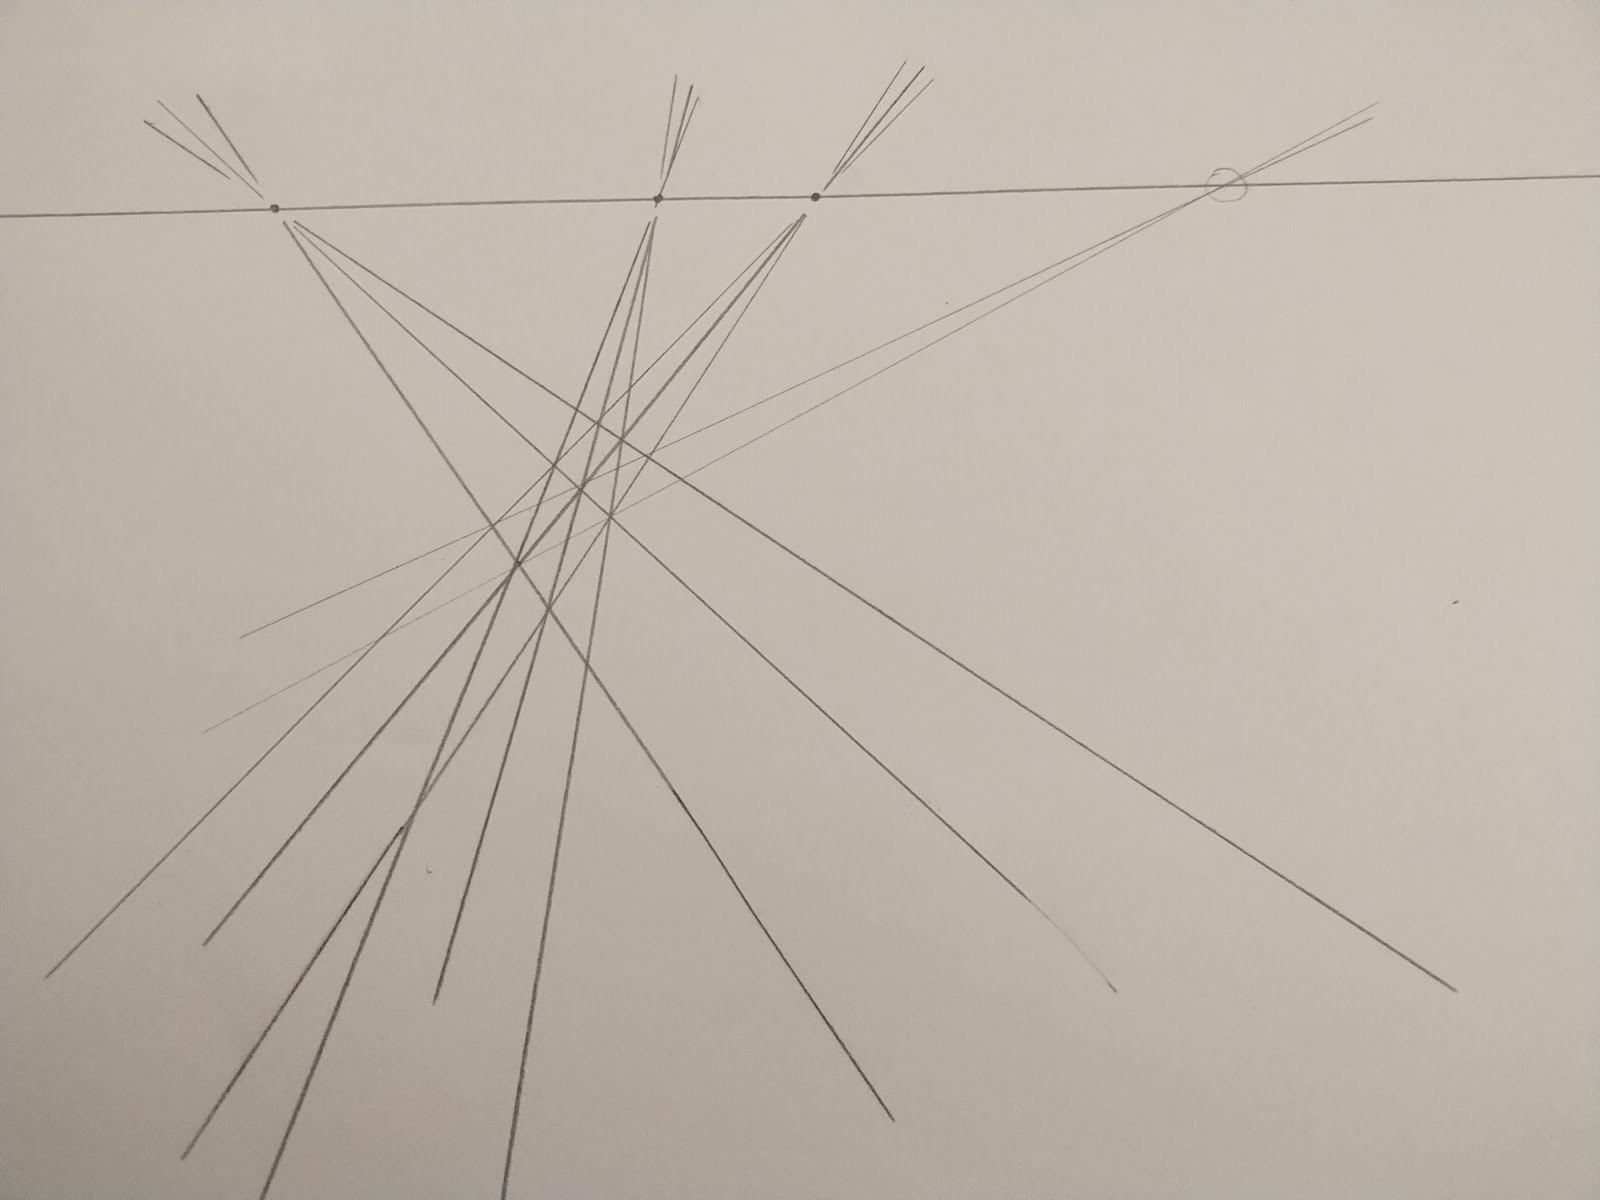
Look at that! We've found a hidden fourth point. This fourth point is called the Harmonic Point and it can lead us, through some working with and thinking about it, to some really startling realizations.
Where was this fourth harmonic point in the first Projective Net drawing with the equidistant points? Think and wonder about that and we'll explore that next time. . .